Previous Chapter ... ... Next Chapter
If you suspect a muscle imbalance has occurred, the most important thing you can do is determine the cause.
Those who work too many "beach muscle" programs at the expense of the back muscles will usually have imbalances at the shoulders. lmbalances in the wrists are usually caused by performing grip strength work without extensor work to complement it. These are just a few examples. You should be able to figure out what is imbalanced by reviewing the progression charts or simply observing how your body responds to your workouts. Once you do this, there is a long list of exercises, mobility, and soft tissue work you can use to correct any imbalances. Much of this has already been presented in other parts of Overcoming Gravity, but here is a generalized comprehensive list:
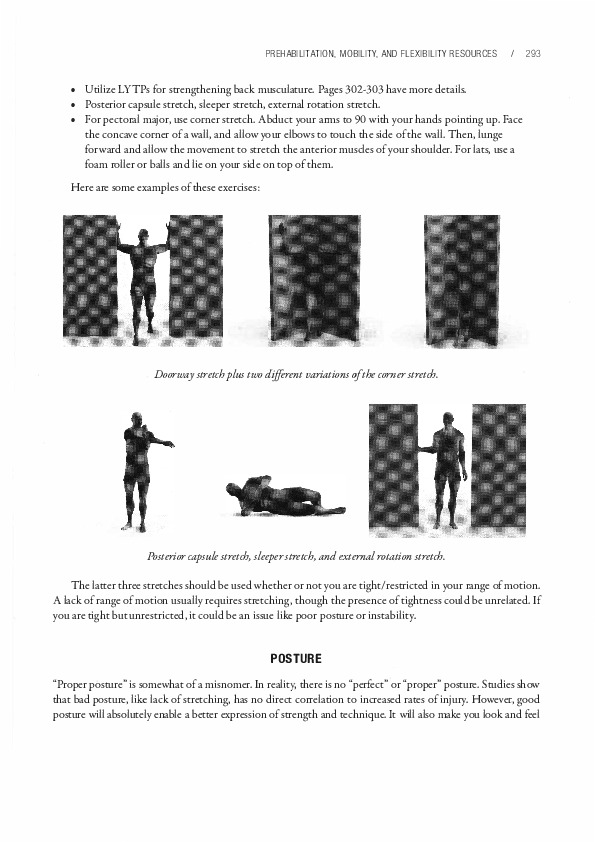
Here are some examples of these exercises:
Doorway stretch plus two different variations of the corner stretch.
Posterior capsule stretch, sleeper stretch, and external rotation stretch.
The latter three stretches should be used whether or not you are tight/restricted in your range of motion. A lack of range of motion usually requires stretching, though the presence of tightness could be unrelated. If you are tight but unrestricted, it could be an issue like poor posture or instability.
"Proper posture" is somewhat of a misnomer. In reality, there is no "perfect" or "proper" posture. Studies show that bad posture, like lack of stretching, has no direct correlation to increased rates of injury. However, good posture will absolutely enable a better expression of strength and technique. It will also make you look and feel
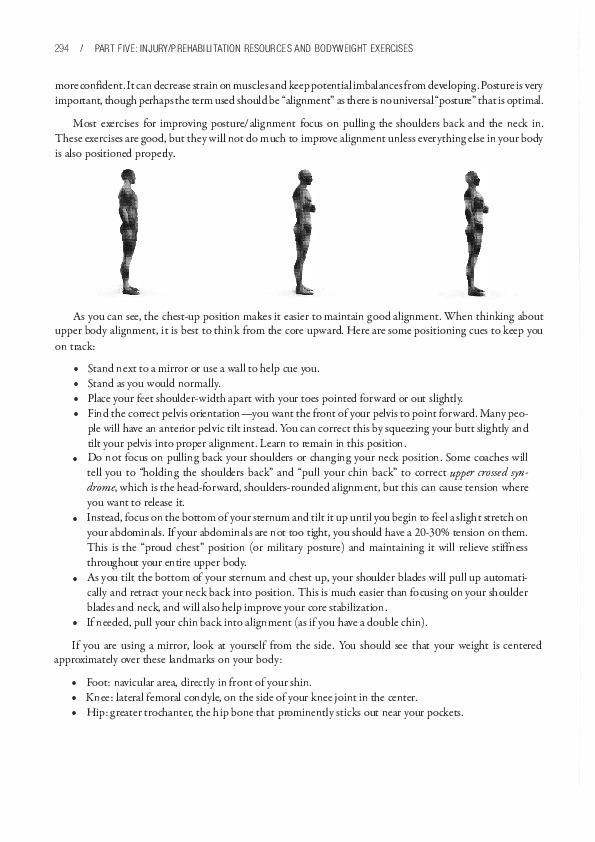
more confident. It can decrease strain on muscles and keep potential imbalances from developing. Posture is very important, though perhaps the term used should be "alignment" as there is no universal "posture" that is optimal. Most exercises for improving posture/alignment focus on pulling the shoulders back and the neck in. These exercises are good, but they will not do much to improve alignment unless everything else in your body is also positioned properly.
As you can see, the chest-up position makes it easier to maintain good alignment. When thinking about upper body alignment, it is best to think from the core upward. Here are some positioning cues to keep you on track:
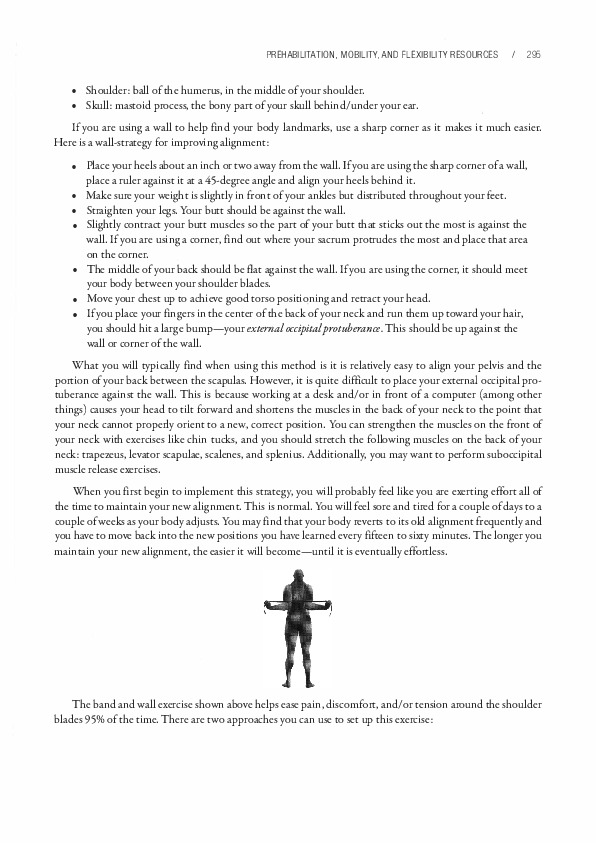
What you will typically find when using this method is it is relatively easy to align your pelvis and the portion of your back between the scapulas. However, it is quite difficult to place your external occipital protuberance against the wall. This is because working at a desk and/or in front of a computer (among other things) causes your head to tilt forward and shortens the muscles in the back of your neck to the point that your neck cannot properly orient to a new, correct position. You can strengthen the muscles on the front of your neck with exercises like chin tucks, and you should stretch the following muscles on the back of your neck: trapezeus, levator scapulae, scalenes, and splenius. Additionally, you may want to perform suboccipital muscle release exercises.
When you first begin to implement this strategy, you will probably feel like you are exerting effort all of the time to maintain your new alignment. This is normal. You will feel sore and tired for a couple of days to a couple of weeks as your body adjusts. You may find that your body reverts to its old alignment frequently and you have to move back into the new positions you have learned every fifteen to sixty minutes. The longer you maintain your new alignment, the easier it will become-until it is eventually effortless. The band and wall exercise shown above helps ease pain, discomfort, and/or tension around the shoulder blades 95% of the time. There are two approaches you can use to set up this exercise:
After you enter this position, there are three different steps you can take to encourage better alignment, release stress, open up the chest area, and decrease tension on your back muscles. When you perform all of these together, you should feel a decrease in pain, discomfort, and/or tension in your neck and shoulder blades. Here are the three steps:
Check your alignment upon finishing this exercise. Your chest area should now be open and you should feel a decrease in muscle cighcness in the front of your shoulders. Any tension/discomfort in the back of your shoulder blades should now be relieved as well. You should be able to easily stand up straight and feel significanty better overall.
This exercise has been used to great effect for gymnastics, parkour, climbing, and even Olympic lifters (wich the overhead position). An over-exaggeration of correct alignment makes it easy to move into a neutral range afterward. The deep breathing helps relax your muscles and release tension, and the scapular retractions with and without elevation and depression help eliminate tension and re-educate your muscles to the appropriate resting length.
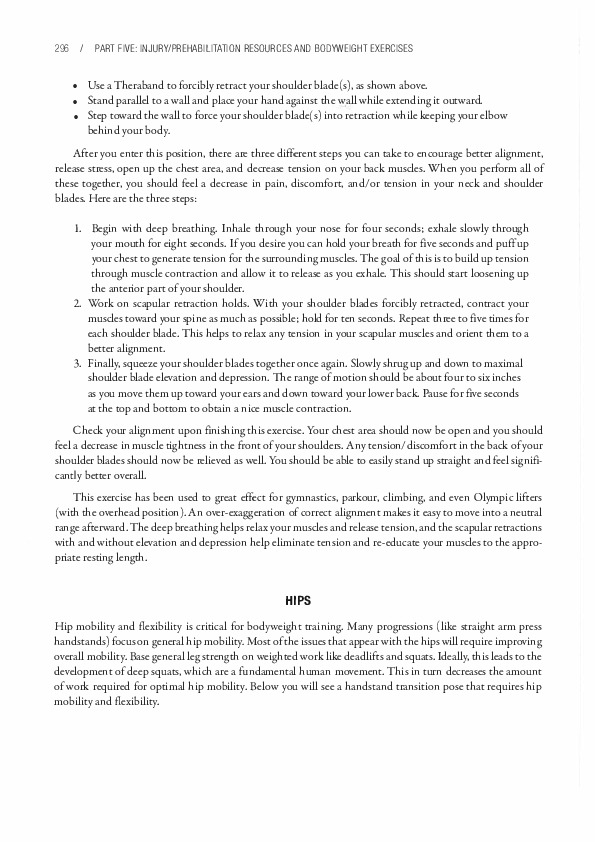
Hip mobility and flexibility is critical for bodyweight training. Many progressions (like straight arm press handstands) focus on general hip mobility. Most of the issues that appear with the hips will require improving overall mobility. Base general leg strength on weighted work like deadlifts and squats. Ideally, this leads to the development of deep squats, which are a fundamental human movement. This in turn decreases the amount of work required for optimal hip mobility. Below you will see a handstand transition pose that requires hip mobility and flexibility.
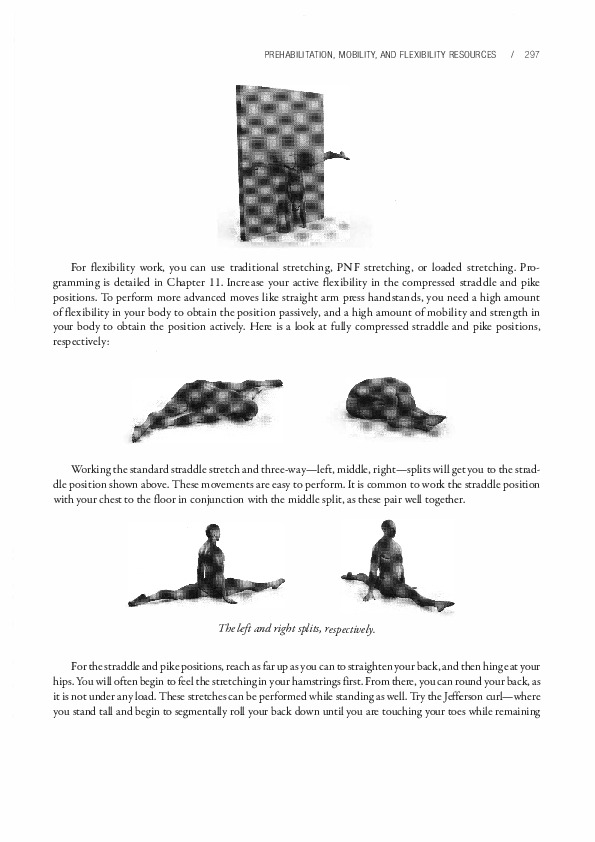
For flexibility work, you can use traditional stretching, PNF stretching, or loaded stretching. Programming is detailed in Chapter 11. Increase your active flexibility in the compressed straddle and pike positions. To perform more advanced moves like straight arm press handstands, you need a high amount of flexibility in your body to obtain the position passively, and a high amount of mobility and strength in your body to obtain the position actively. Here is a look at fully compressed straddle and pike positions, respectively:
Working the standard straddle stretch and three-way-left, middle, right-splits will get you to the straddle position shown above. These movements are easy to perform. It is common to work the straddle position with your chest to the floor in conjunction with the middle split, as these pair well together. The left and right splits, respectively.
For the straddle and pike positions, reach as far up as you can to straighten your back, and then hinge at your hips. You will often begin to feel the stretching in your hamstrings first. From there, you can round your back, as it is not under any load. These stretches can be performed while standing as well. Try the Jefferson curl-where you stand tall and begin to segmentally roll your back down until you are touching your toes while remaining
standing. This can rapidly increase your flexibility gains, especially if you use weights while performing the movement. Be careful, though, as it is easy to injure yourself when you round your back while using weights.
The technique for the splits is straightforward. The main thing you want to focus on is keeping your quadriceps (located in the front of your leg) pointed toward the ground. While you are stretching, it is very easy for your hips to turn out and your leg to rotate. This may provide a false sense that you are increasing flexibility, but it should actually be avoided. You should also keep your torso upright as much as possible; you can bring your front knee to your chest to achieve an extra hamstring stretch if needed.
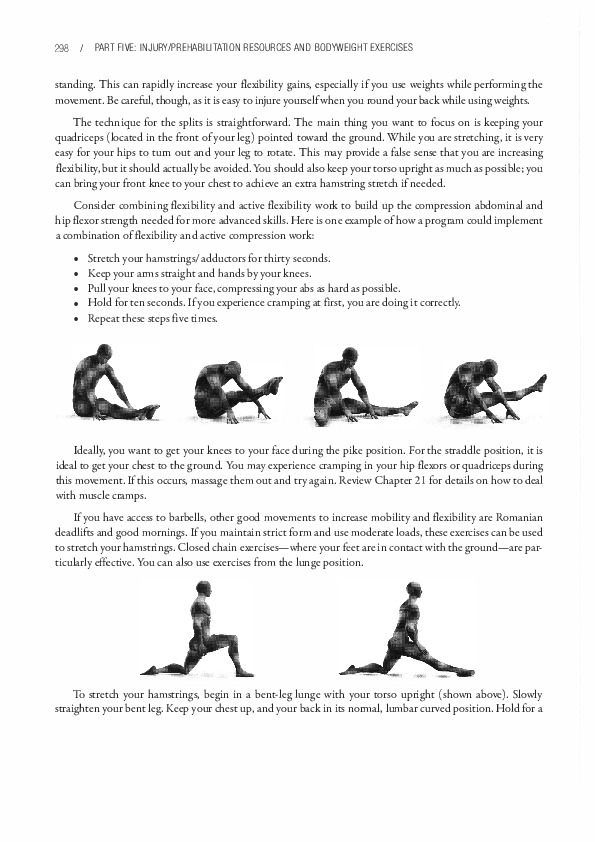
Consider combining flexibility and active flexibility work to build up the compression abdominal and hip flexor strength needed for more advanced skills. Here is one example of how a program could implement a combination of flexibility and active compression work:
Ideally, you want to get your knees to your face during the pike position. For the straddle position, it is ideal to get your chest to the ground. You may experience cramping in your hip flexors or quadriceps during this movement. If this occurs, massage them out and try again. Review Chapter 21 for details on how to deal with muscle cramps.
If you have access to barbells, other good movements to increase mobility and flexibility are Romanian deadlifts and good mornings. If you maintain strict form and use moderate loads, these exercises can be used to stretch your hamstrings. Closed chain exercises-where your feet are in contact with the ground-are particularly effective. You can also use exercises from the lunge position.
To stretch your hamstrings, begin in a bent-leg lunge with your torso upright (shown above). Slowly straighten your bent leg. Keep your chest up, and your back in its normal, lumbar curved position. Hold for a
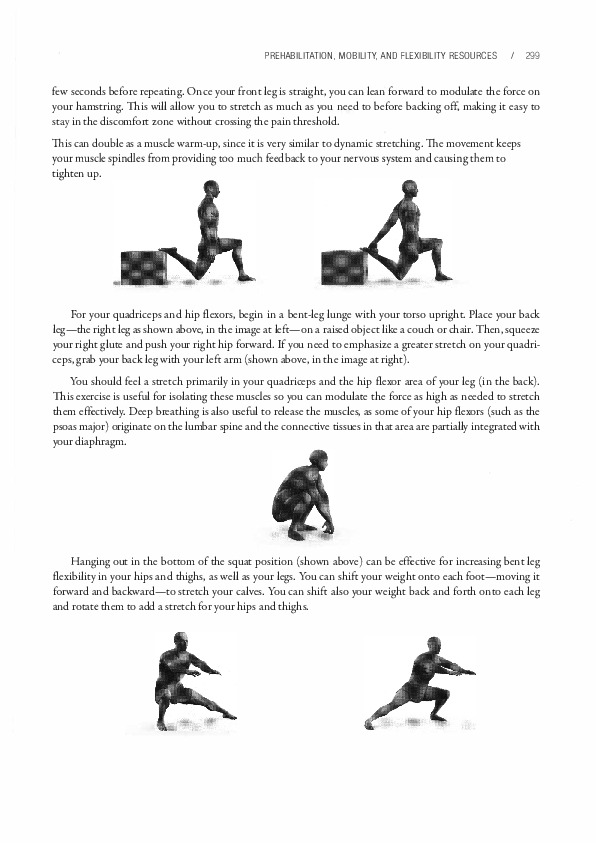
few seconds before repeating. Once your front leg is straight, you can lean forward to modulare the force on your hamstring. This will allow you to stretch as much as you need to before backing off, making it easy to stay in the discomfort zone without crossing the pain threshold. This can double as a musde warm-up, since it is very similar to dynamic stretching. The movement keeps your musde spindles from providing too much feedback to your nervous system and causing them to tighten up.
For your quadriceps and hip flexors, begin in a bent-leg lunge with your torso upright. Place your back leg-the right leg as shown above, in the image at lefr-on a raised object like a couch or chair. Then, squeeze your right glute and push your right hip forward. If you need to emphasize a greater stretch on your quadriceps, grab your back leg with your lefr arm (shown above, in the image at right).
You should feel a stretch primarily in your quadriceps and the hip flexor area of your leg (in the back). This exercise is useful for isolating these musdes so you can modulare the force as high as needed to stretch them effectively. Deep breathing is also useful to release the muscles, as some of your hip flexors (such as the psoas major) originate on the lumbar spine and the connective tissues in that area are partially integrated with your diaphragm.
Hanging out in the bottom of the squat position (shown above) can be effective for increasing bent leg flexibility in your hips and thighs, as well as your legs. You can shift your weight onto each foot-moving it forward and backward-to stretch your calves. You can shifr also your weight back and forth onto each leg and rotate them to add a stretch for your hips and thighs.
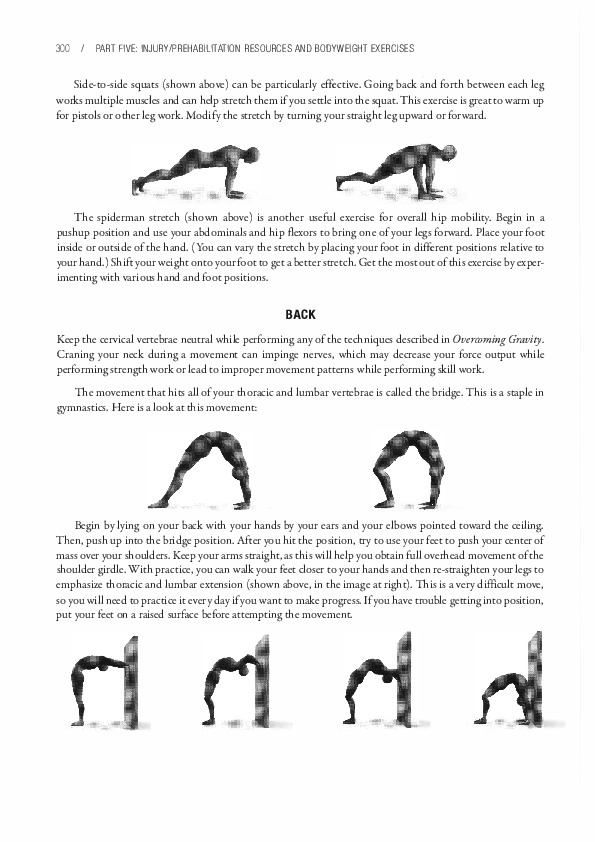
Side-to-side squats (shown above) can be particularly effective. Going back and forth between each leg works multiple muscles and can help stretch them if you settle into the squat. This exercise is great to warm up far pistols or other leg work. Modify the stretch by turning your straight leg upward or forward.
The spiderman stretch (shown above) is another useful exercise far overall hip mobility. Begin in a pushup position and use your abdominals and hip flexors to bring one of your legs forward. Place your foot inside or outside of the hand. (You can vary the stretch by placing your foot in different positions relative to your hand.) Shift your weight onto your foot to get a better stretch. Get the most out of this exercise by experimenting with various hand and foot positions.
Keep the cervical vertebrae neutral while performing any of the techniques described in Overcoming Gravity. Craning your neck during a movement can impinge nerves, which may decrease your force output while performing strength work or lead to improper movement patterns while performing skill work.
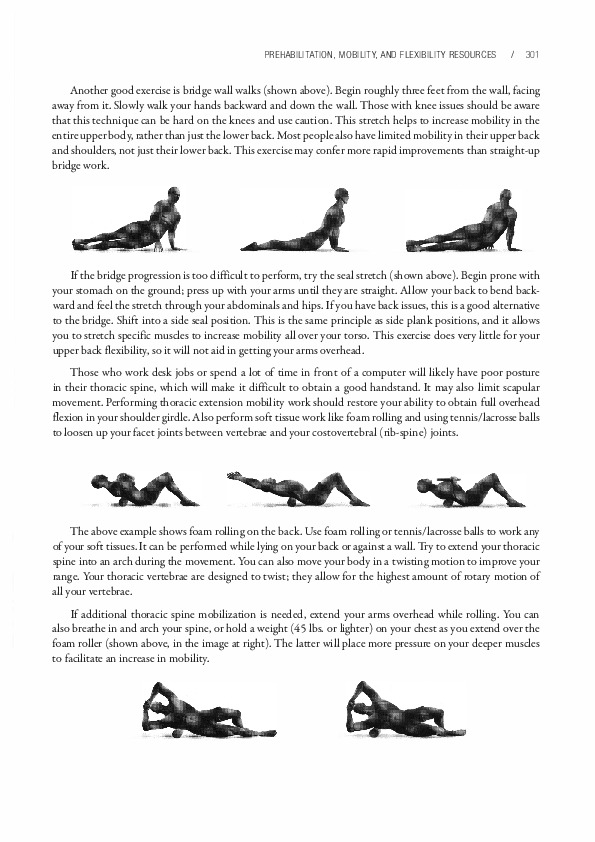
The movement that hits all of your thoracic and lumbar vertebrae is called the bridge. This is a staple in gymnastics. Here is a look at this movement:
Begin by lying on your back with your hands by your ears and your elbows pointed toward the ceiling. Then, push up into the bridge position. After you hit the position, try to use your feet to push your center of mass over your shoulders. Keep your arms straight, as this will help you obtain full overhead movement of the shoulder girdle. With practice, you can walk your feet closer to your hands and then re-straighten your legs to emphasize thoracic and lumbar extension (shown above, in the image at right). This is a very difficult move, soyou will need to practice it every day if you want to make progress. If you have trouble getting into position, put your feet on a raised surface before attempting the movement.
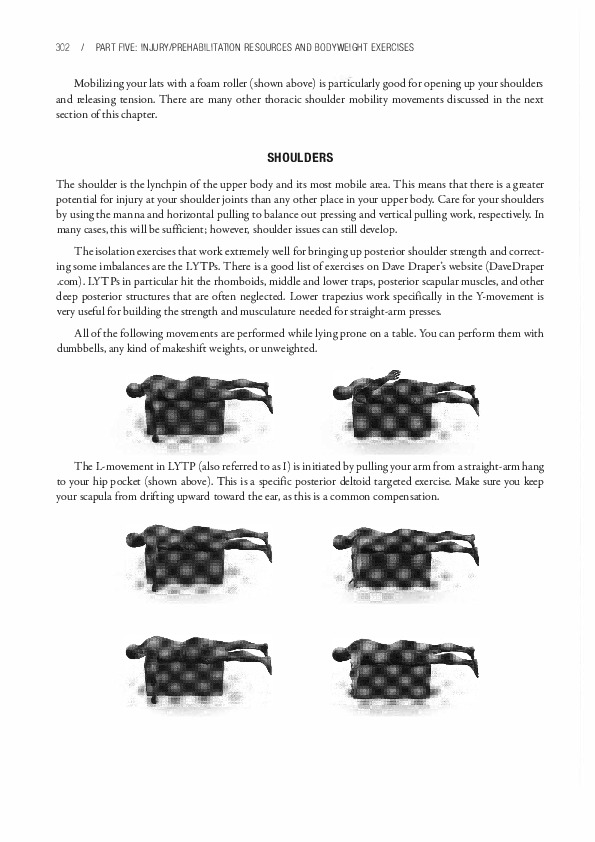
Another good exercise is bridge wall walks (shown above). Begin roughly three feet from the wall, facing away from it. Slowly walk your hands backward and down the wall. Those with knee issues should be aware that this technique can be hard on the knees and use caution. This stretch helps to increase mobility in the entire upper body, rather than just the lower back. Most people also have limited mobility in their upper back and shoulders, not just their lower back. This exercise may confer more rapid improvements than straight-up bridge work.
If the bridge progression is too difficult to perform, try the seal stretch (shown above). Begin prone with your stomach on the ground; press up with your arms until they are straight. Allow your back to bend backward and feel the stretch through your abdominals and hips. If you have back issues, this is a good alternative to the bridge. Shift into a side seal position. This is the same principle as side plank positions, and it allows you to stretch specific muscles to increase mobility all over your torso. This exercise does very little for your upper back flexibility, so it will not aid in getting your arms overhead.
Those who work desk jobs or spend a lot of time in front of a computer will likely have poor posture in their thoracic spine, which will make it difficult to obtain a good handstand. It may also limit scapular movement. Performing thoracic extension mobility work should restare your ability to obtain full overhead flexion in your shoulder girdle. Also perform soft tissue work like foam rolling and using tennis/lacrosse halls to loosen up your facet joints between vertebrae and your costovertebral (rib-spine) joints.
The above example shows foam rolling on the back. Use foam rolling or tennis/lacrosse halls to work any of your soft tissues. It can be performed while lying on your back or against a wall. Try to extend your thoracic spine into an arch during the movement. You can also move your body in a twisting motion to improve your range. Your thoracic vertebrae are designed to twist; they allow for the highest amount of rotary motion of all your vertebrae.
If additional thoracic spine mobilization is needed, extend your arms overhead while rolling. You can also breathe in and arch your spine, or hold a weight (45 lbs. or lighter) on your chest as you extend over the foam roller (shown above, in the image at right). The latter will place more pressure on your deeper muscles to facilitate an increase in mobility.
Mobilizing your lats with a faam roller (shown above) is particularly good far opening up your shoulders and releasing tension. There are many other thoracic shoulder mobility movements discussed in the next section of this chapter.
The shoulder is the lynchpin of the upper body and its most mobile area. This means that there is a greater potential far injury at your shoulder joints than any other place in your upper body. Care far your shoulders by using the manna and horizontal pulling to balance out pressing and vertical pulling work, respectively. In many cases, this will be sufficient; however, shoulder issues can still develop.
The isolation exercises that work extremely well far bringing up posterior shoulder strength and correcting some imbalances are the LYTPs. There is a good list of exercises on Dave Draper's website (DaveDraper .com). LYTPs in particular hit the rhomboids, middle and lower traps, posterior scapular muscles, and other deep posterior structures that are often neglected. Lower trapezius work specifically in the Y-movement is very useful far building the strength and musculature needed far straight-arm presses.
All of the fallowing movements are done while lying prone on a table. You can perfarm them with dumbbells, any kind of makeshift weights, or unweighted.
The L-movement in LYTP (also referred to as I) is initiated by pullingyour arm from a straight-arm hang to your hip pocket (shown above).This is a specific posterior deltoid targeted exercise. Make sure you keep your scapula from drifting upward toward the ear, as this is a common compensation.

The T-movement in LYTP is a mid-trapezius and rhomboid exercise. Begin with your arm straight and extend it straight out horizontally with your palm down. (If you do both arms simultaneously, your body will form a "T".) Focus on pushing your hand as far from your body as possible without your body rising up off the table, and then retract your scapula near the top. When you do this with your palm facing down (shown above, first row of images), it will hit your rhomboids. When you do this with your thump up (shown above, second row of images), it will hit your mid-trapezius.
The Y-movement in LYTP is a lower-trapezius exercise. Begin with your arm straight and extend it straight out, horizontally, with your palm down._ If you do both arm simultaneously, your body will form a "Y". Next, move your arm upward with your thumb facing up at a 110-degree angle between your head/torso and your shoulder. Push your hand as far away from your body as possible. As your hand rises, your scapula will naturally begin retracting and depressing simultaneously. Focus on the contraction of your scapula in order to get best lower-trapezius exercise possible. This is probably the most important exercise of the four LYTP movements because your lower-trapezius is often the weakest of your natural triangle of scapular stabilizers, which include your serratus anterior, upper-trapezius, and lower-trapezius. Strengthening this muscle will help keep your shoulders healthy.
The P-movement in LYTP is the pivot prone position. This can be performed on the ground. Begin by forming an arrow using both arms with your body as the center of the arrow (shown above, first row of images). Then, bend your elbows nearly all the way. This should put your arms in a W-position, as shown above in the second row of images. Next, attempt to rotate your hands so that they face backward. This will activate the external rotators in your shoulder, as well as most of your other scapular muscles. This exercise provides your back muscles with a strong contractor that sets them up to effectively perform an isolation movement.
Scapular pushups (shown above) are useful to hit your serratus anterior; particularly good if the shoulders cannot stay protracted during the planche.The key to this exercise is to push your hands as far away from your
body as possible. Begin by getting into a pushup position with a straight body. Allow your shoulders to sink and your scapulas to pop out. Then, push your hands away from your body while keeping your arms straight. This will directly hit the serratus anterior muscles and help you find a good protracted shoulder position for the planche.
Most people have some limitation in their pectorals, lats, teres major, and the other shoulder muscles in respect to their ability to move their arms fully overhead (for handstands) and backward (for manna). Most mobility and flexibility work will be aimed at increasing mobility in these planes. A T heraband is useful for most of the exercises below.
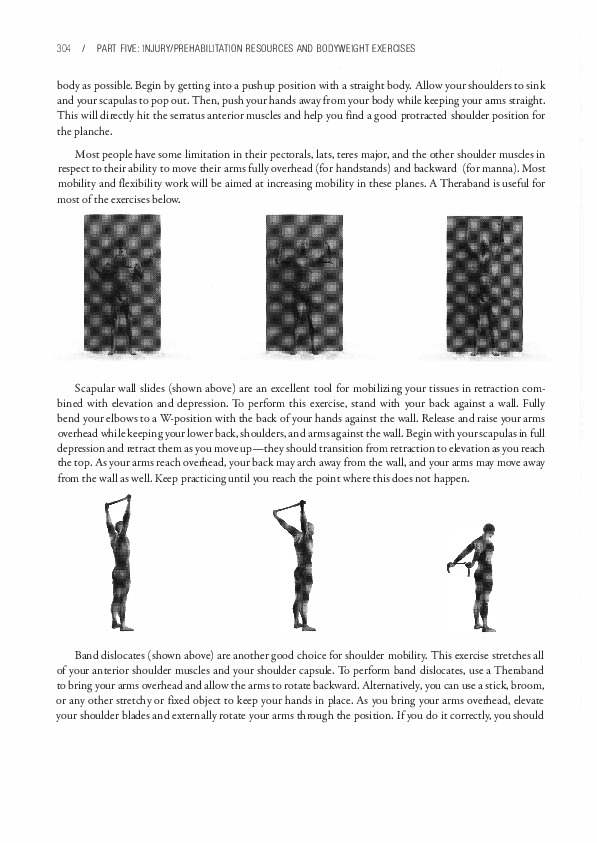
Scapular wall slides (shown above) are an excellent tool for mobilizing your tissues in retraction combined with elevation and depression. To perform this exercise, stand with your back against a wall. Fully bend your elbows to a W-position with the back of your hands against the wall. Release and raise your arms overhead while keeping your lower back, shoulders, and arms against the wall. Begin with your scapulas in full depression and retract them as you move up-they should transition from rerraction to elevation as you reach the top. As your arms reach overhead, your back may arch away from the wall, and your arms may move away from the wall as well. Keep practicing until you reach the point where this does not happen.
Band dislocates (shown above) are another good choice for shoulder mobility. This exercise stretches all of your anterior shoulder muscles and your shoulder capsule. To perform band dislocares, use a Theraband to bring your arms overhead and allow the arms to rotate backward. Alternatively, you can use a stick, broom, or any other stretchy or fixed object to keep your hands in place. As you bring your arms overhead, elevate your shoulder blades and externally rotate your arms rhrough the position. If you do it correctly, you should
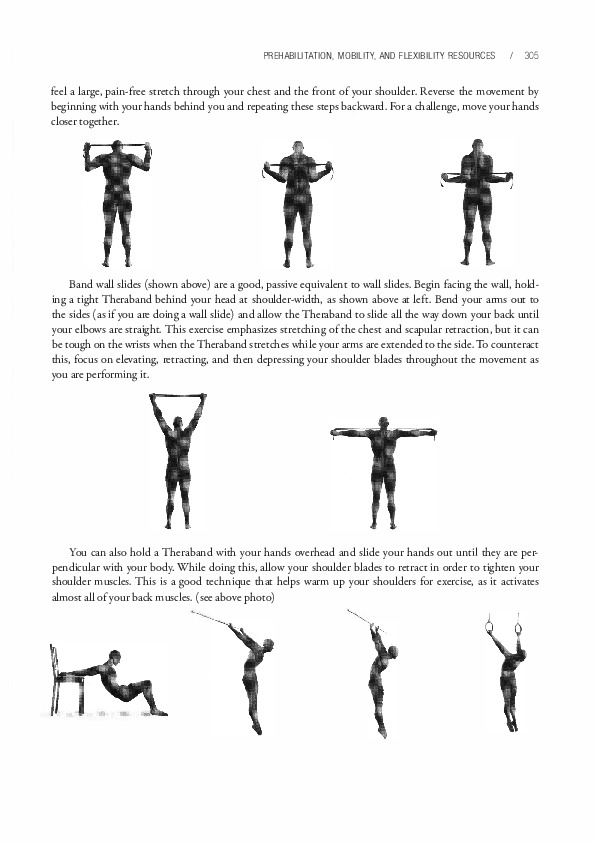
feel a large, pain-free stretch through your chest and the front of your shoulder. Reverse the movement by beginning with your hands behind you and repeating these steps backward. For a challenge, move your hands closer together.
Band wall slides (shown above) are a good, passive equivalent to wall slides. Begin facing the wall, holding a tight Theraband behind your head at shoulder-width, as shown above at left. Bend your arms out to the sides (as if you are doing a wall slide) and allow the Theraband to slide all the way down your back until your elbows are straight. This exercise emphasizes stretching of the chest and scapular retraction, but it can be tough on the wrists when the Theraband stretches while your arms are extended to the side. To counteract this, focus on elevating, retracting, and then depressing your shoulder blades throughout the movement as you are performing it.
You can also hold a Theraband with your hands overhead and slide your hands out until they are perpendicular with your body. While doing this, allow your shoulder blades to retract in order to tighten your shoulder muscles. This is a good technique that helps warm up your shoulders for exercise, as it activates almost all of your back muscles. (see above photo)
There are many types of exercises for passive shoulder flexibility (behind the back, in extension) including: stretching with a chair (shown above, first image), using a Theraband to lock your hands together while using a raised surface to stretch your arms backward, and German hangs with a pull-up bar. As shown in two of the above images, you can place your hands on the bar in a chin-up or pull-up position. Then, bring your legs through your hands and relax into a stretch as shown above. This exercise can be performed on the rings as well (as shown in the last image above).
The chin-up position provides good conditioning for the elbows, a necessity for many straight-arm isometric exercises. When performing this, your elbows should face backward or down when there is tension on them. If you relax while in this position, you may feel this tension in your elbow joint, so be sure to keep your arms straight and contract your biceps so there is tension through your elbows.
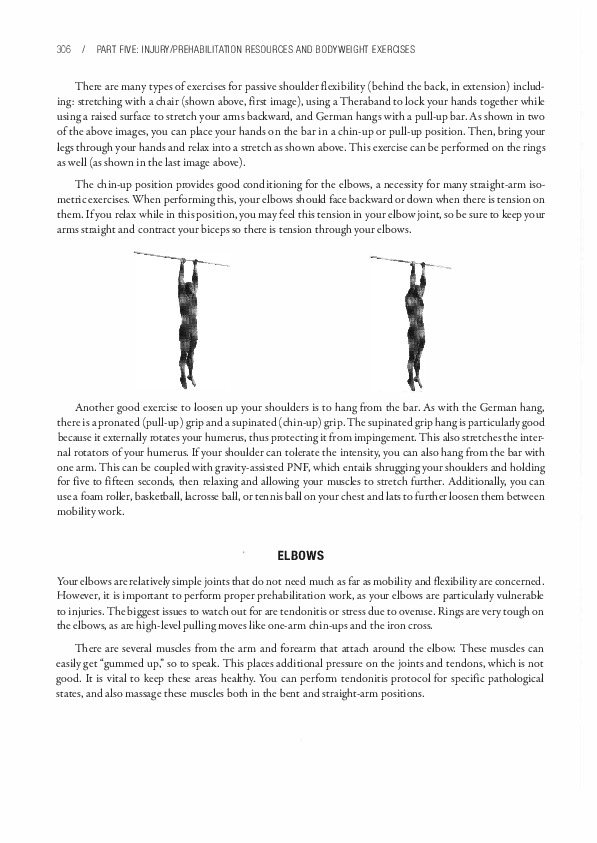
Another good exercise to loosen up your shoulders is to hang from the bar. As with the German hang, there is a pronated (pull-up) grip and asupinated (chin-up) grip. The supinated grip hang is particularly good because it externally rotates your humerus, thus protecting it from impingement. This also stretches the internal rotators of your humerus. If your shoulder can tolerare the intensity, you can also hang from the bar with one arm. This can be coupled with gravity-assisted PNF, which entails shrugging your shoulders and holding for five to fifteen seconds, then relaxing and allowing your muscles to stretch further. Additionally, you can use a foam roller, basketball, lacrosse hall, or tennis ball on your chest and lats to further loosen them between mobility work.
Your elbows are relatively simple joints that do not need much as far as mobility and flexibility are concerned. However, it is important to perform proper prehabilitation work, as your elbows are particularly vulnerable to injuries. The biggest issues to watch out for are tendonitis or stress due to overuse. Rings are very tough on the elbows, as are high-level pulling moves like one-arm chin-ups and the iron cross.
There are several muscles from the arm and forearm that attach around the elbow. These muscles can easily get "gummed up" so to speak. This places additional pressure on the joints and tendons, which is not good. It is vital to keep these areas healthy. You can perform tendonitis protocol for specific pathological states, and also massage these muscles both in the bent and straight-arm positions.
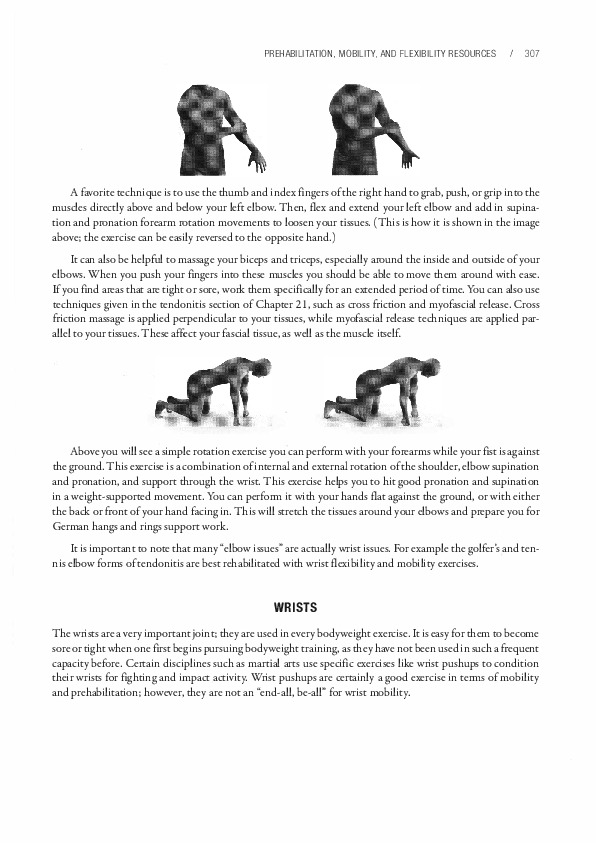
A favorite technique is to use the thumb and index fingers of the right hand to grab, push, or grip into the muscles directly above and below your left elbow. Then, flex and extend your left elbow and add in supinadon and pronation forearm rotation movements to loosen your dssues. (This is how it is shown in the image above; the exercise can be easily reversed to the opposite hand.)
It can also be helpful to massage your biceps and triceps, especially around the inside and outside of your elbows. When you push your fingers into these muscles you should be able to move them around with ease. If you find areas that are tight or sore, work them specifically for an extended period of time. You can also use techniques given in the tendonitis section of Chapter 21, such as cross friction and myofascial release. Cross friction massage is applied perpendicular to your tissues, while myofascial release techniques are applied parallel to your tissues. These affect your fascial tissue, as well as the muscle itself.
Above you will see a simple rotation exercise you can perform with your forearms while your fist is against the ground. This exercise is a combination of internal and external rotadon of the shoulder, elbow supination and pronation, and support through the wrist. This exercise helps you to hit good pronation and supination in a weight-supported movement. You can perform it with your hands flat against the ground, or with either the back or front of your hand facing in. This will stretch the tissues around your elbows and prepare you for German hangs and rings support work.
It is important to note that many "elbow issues" are actually wrist issues. For example the golfer's and tennis elbow forms of tendonitis are best rehabilitated with wrist flexibility and mobility exercises.
The wrists are a very important joint; they are used in every bodyweight exercise. It is easy for them to become sore or tight when one first begins pursuing bodyweight training, as they have not been used in such a frequent capacity before. Certain disciplines such as mardal arts use specific exercises like wrist pushups to condition their wrists for fighting and impact activity. Wrist pushups are certainly a good exercise in terms of mobility and prehabilitation; however, they are not an "end-all, be-all" for wrist mobility.
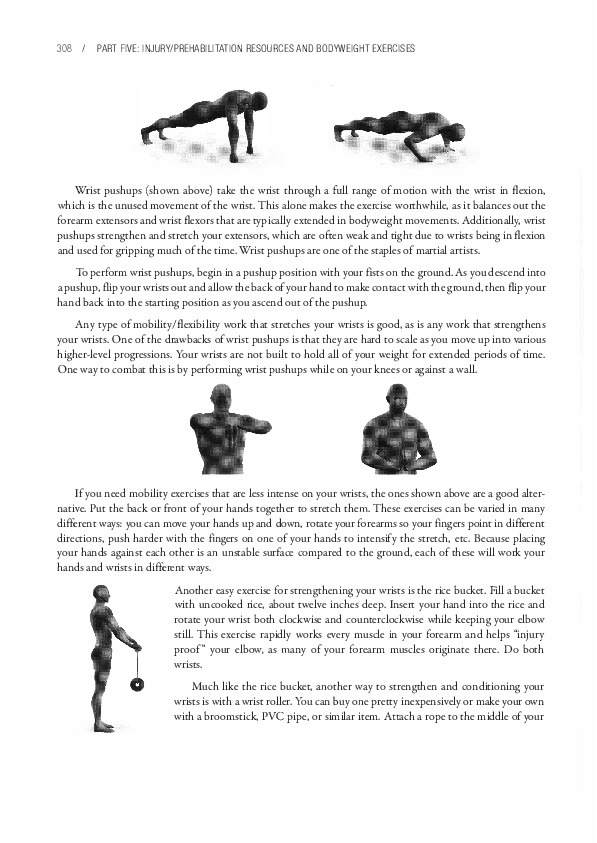
Wrist pushups (shown above) take the wrist through a full range of motion with the wrist in flexion, which is the unused movement of the wrist. This alone makes the exercise worthwhile, as it balances out the forearm extensors and wrist flexors that are typically extended in bodyweight movements. Additionally, wrist pushups strengthen and stretch your extensors, which are often weak and tight due to wrists being in flexion and used for gripping much of the time. Wrist pushups are one of the staples of martial artists.
To perform wrist pushups, begin in a pushup position with your fists on the ground. As you descend into a pushup, flip your wrists out and allow the back of your hand to make contact with the ground, then flip your hand back into the starting position as you ascend out of the pushup.
Any type of mobility/flexibility work that stretches your wrists is good, as is any work that strengthens your wrists. One of the drawbacks of wrisc pushups is that they are hard to scale as you move up into various higher-level progressions. Your wrists are not builc to hold all of your weight for extended periods of time. One way to combat this is by performing wrist pushups while on your knees or against a wall.
If you need mobility exercises that are less intense on your wrists, the ones shown above are a good alternative. Put the back or front of your hands together to stretch them. These exercises can be varied in many different ways: you can move your hands up and down, rotate your forearms so your fingers point in different directions, push harder with the fingers on one of your hands to intensify the stretch, etc. Because placing your hands against each other is an unstable surface compared to the ground, each of these will work your hands and wrists in different ways.
Another easy exercise for strengthening your wrists is the rice bucket. Fill a bucket with uncooked rice, about twelve inches deep. Insert your hand into the rice and rotate your wrist both clockwise and counterclockwise while keeping your elbow still. This exercise rapidly works every muscle in your forearm and helps "injury proof" your elbow, as many of your forearm muscles originate there. Do both wrists.
Much like the rice bucket, another way to strengthen and conditioning your wrists is with a wrist roller. You can huy one pretty inexpensively or make your own with a broomstick, PVC pipe, or similar item. Accach a rope to the middle of your
roller and place a weight on the end of the rope. Regardless of whether you buy or make one, a wrist roller is very easy to use: simply hold it out in front of you and use your wrists to roll it up while keeping your arms steady. You can also use a barbell, power rack, or other mounted device to focus more on the wrists. specific grip work (which can help with strength development) can also be used at your discretion.
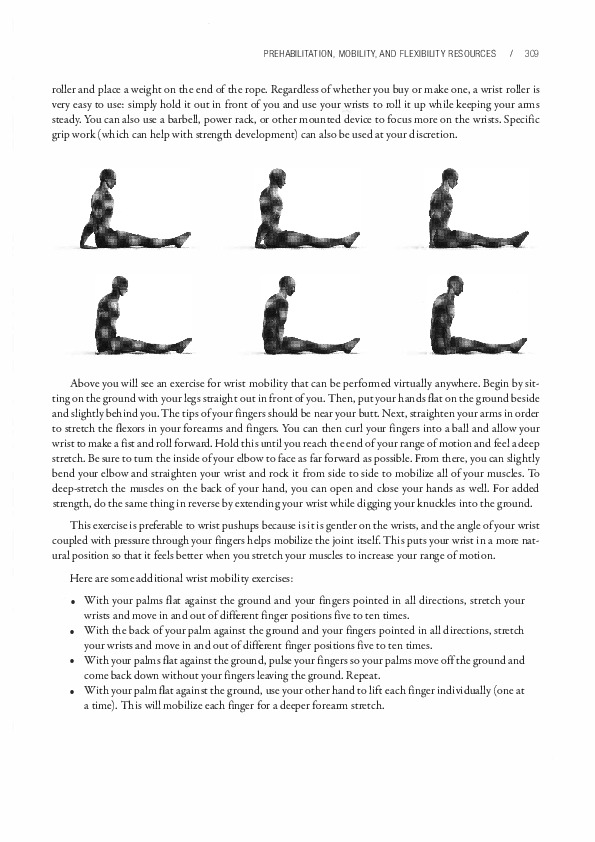
Above you will see an exercise for wrist mobility that can be performed virtually anywhere. Begin by sitting on the ground with your legs straight out in front of you. Then, put your hands flat on the ground beside and slightly behind you. The tips of your fingers should be near your butt. Next, straighten your arms in order to stretch the flexors in your forearms and fingers. You can then curl your fingers into a hall and allow your wrist to make a flst and roll forward. Hold this until you reach the end of your range of motion and feel a deep stretch. Be sure to turn the inside of your elbow to face as far forward as possible. From there, you can slightly bend your elbow and straighten your wrist and rock it from side to side to mobilize all of your muscles. To deep-stretch the muscles on the back of your hand, you can open and close your hands as well. For added strength, do the same thing in reverse by extending your wrist while digging your knuckles into the ground. This exercise is preferable to wrist pushups because is it is gentler on the wrists, and the angle of your wrist coupled with pressure through your fingers helps mobilize the joint itself. This puts your wrist in a more natural position so that it feels better when you stretch your muscles to increase your range of motion.
Here are some additional wrist mobility exercises:
Since your wrists do not get much overall blood flow but often have to support your full weight while performing bodyweight exercises, they are prone to soreness. If that is the case, contrast baths can be quite useful. Cold water alone will constrict your blood vessels and ease inflammation. However, contrast baths go a step further: they ease inflammation and then force blood in and out of the area due to alternating water temperatures.
Contrast bachs are easy. Fill two buckets with water. One bucket should be as cold as possible (you can add it.); the other bucket should be as hot as you can stand. Try filling the bucket halfway with warm water and adding boiling water on top of chat; just be very careful not to scald yourself. You should immerse your hand/wrist in each bucket for about a minute, than switch to the other bucket. For best results, begin and end with your hand/wrist in the cold bucket. Go back and forth between buckets five to ten times per session, two sessions a day, four to five days per week.
You do not have to be idle while you soak your wrists in a contrasc bach. You can move your fingers around, stretch and mobilize your wrists in various positions, and perform a lot of general movement-good for your tendons, muscles, and joints.
Contrast showers can be used in the same manner, but for the entire body rather than just your hands/ wrists. Scientific literature on total immersion it. baths or showers bears conflicting information. Many studies show contrast showers provide no benefits in regard to reducing soreness or improving performance. However, they definitely work in many cases-even if it is just a psychological or placebo effect. if it works, why not give it a try? Many trainers continue to use contrast showers in the belief that they offer a benefit in regards to overalltissue health, however minor. Always begin and end with cold. It may not be fon at firsc, but many people find it quite refreshing once they get used to it.
Calluses can be a huge problem if they become too big, as they can tear easily. There are numerous ways to address this. Whatever you choose to do, be safe!
As for rips or "flappers': they are miserable, as you can get them anywhere on your hands. Bodyweight training itself does not cause this, but it is possible to rip a portion of your skin if you let calluses grow too big, train a lot of swinging movements, or do anything that puts a lot of force on your hands.
As far as treatment goes, the first thing is to use a nail clipper or scissors to remove the extra skin. You can rip them off with your fingers, but you run the risk of ripping off more skin than necessary. If you decide to do this anyway, be sure to rip the skin "down and away." Once the offending "flap" is gone, the next step is to treat the area when you go to the gym or train. Do this by applying chalk to the affected area, followed by
light pressure or friction, as this will speed up the growth of new skin. The only way you can actually rebuild a callus is to use new skin. When you perform a movement, go to the point where the pain is tolerable, but not to the point where you rip your skin further or bleed. When you go home, be sure to stretch your affected hand(s) by extending your fingers in a pulsing motion. This will ensure that the new skin grows with adequate flexibility so it does not tear when you extend your fingers all the way. You should also moisturize your hands as they are healing so your skin does not crack and cause a more serious condition. Beyond this, you do not need to do anything fancy. Your body is good at healing itselfif you take a few simple steps and then allow the process to take place.
This chapter discussed how prehabilitation, mobility, and flexibility are all related to each other in the context of keeping your body healthy.
Some of the specifics were analyzed on how mobility and flexibility relate to injuries and pain. Treatment methods for acute and chronic pain will vary wildly. Techniques that use both the musculoskeletal and neuromuscular aspects represent the best "standard approach." (Remember that techniques that work well for one person may not work well for another.)
Specific prehabilitation, mobility, and flexibility exercises/techniques were presented for use in five key areas: the hips, back, shoulders, elbows, and wrists. Also discussed were contrast baths, contrast showers, and how to treat calluses and rips.
Previous Chapter ... ... Next Chapter