All about the Hip Hinge:
The Hip hinge is one of the most fundamental movement patterns that as a society, most people have simply lost the capacity to perform. Our collectively sedentary, chair-adapted lifestyle has made us a population of individuals whose hips are more restricted than our lower backs. As a result, the body moves through the path of least resistance and when we need to bend over to get something, it looks a little something like this:
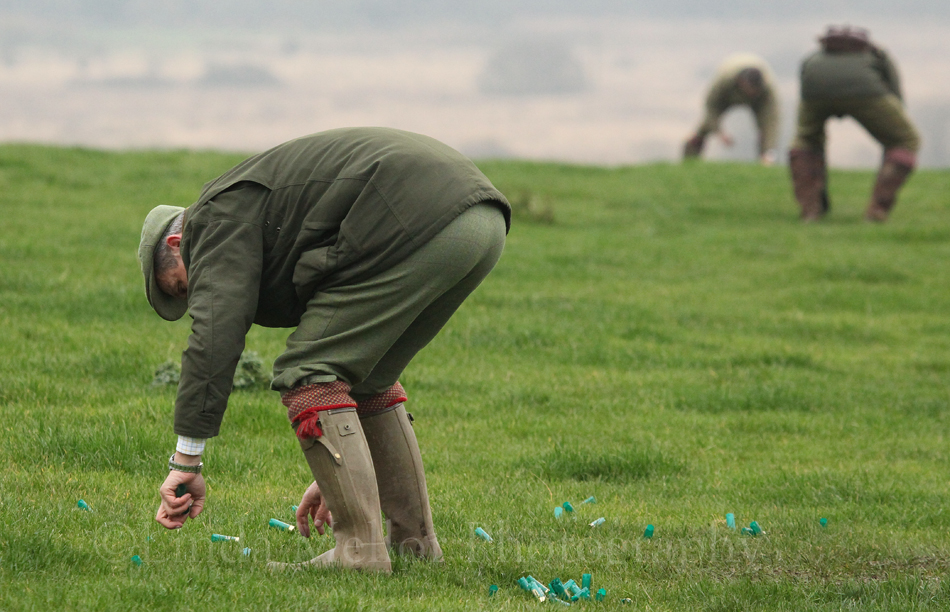
In a majority of circumstances, this position isn’t bad at all!. It’s perfectly fine if you’re reaching down to pickup a water bottle, collecting dirty laundry from your floor, or if you dropped your keys! But if you’re bending down hundreds of times in a day or bending over to pick up something very heavy like a sofa or some heavy boxes, this way of bending over can become irritating to your back. When you’re picking up something nice and light once in a while, it doesn’t really matter, but the heavier that item is, the more it will put an undue amount of strain on your back that should be taken by the strong muscles in your hips; your glutes!
This is the same logic where the old manual labour advice of “Lift with your knees, not your back!” comes from, in order to try to reduce the incidence of back pain in people who pick up heavy stuff for a living. This advice is actually only partly true, and in many cases of awkwardly shaped objects, simply not possible. The truth of the matter is “Lift with your hips and your knees, not your back!”. But that is a lot more complex and nuanced and requires a LOT of explanation. For that reason it would be a significantly less effective widespread workplace health and safety guideline.
For clarity as well, in the guideline of: “Lift with your hips and your knees, not your back!”, it does not imply that your back should not be working at all, but rather that it should not be working to lift the object. When an object is heavy enough, your back muscles will be working very hard to hold itself in a rigid position and stop itself folding in half in response to the heavy weight.
The difference is that the back itself is not going through the process of lifting the weight. If your back starts very rounded, and has to unfurl like an armadillo as you lift the weight up, that’s lifting with your back and is putting an amount of strain on your spine that is disproportionate to the difficulty of the task. If your back stays nice and straight the whole time and all of the movement comes from the hips, then the movement will be driven by your glutes, and your back is only working as hard as it needs to in order to stabilise itself.
Here is an example of what bending over to pick something up using your hips looks like (just pretend this yoga block is a heavy box or half of a sofa). Nice straight back, full range of motion at the hips, and as much as needed in the knees to get all the way down to what I’m grabbing.
The difficulty in achieving this for many people breaks down to two main barriers: First, the lack of coordination to move at the hip. Second, a restriction in the flexibility of your hamstrings to move at the hip far enough that you can reach the ground. The good news is, simply hinging to the end of your natural range of motion on a regular basis should be enough to improve your hamstring range of motion over time. Therefore, the only thing to do, is simply learn to hinge.
In order to learn the hinge most effectively, we are only going to learn it in isolation at first, so we won’t be picking anything up just yet. Once you learn to hinge, you can add load to that using a barbell to perform a Romanian Deadlift (RDL), and then take that all the way to picking things up off the floor using a Deadlift.
So let’s learn how to hinge!
Hip Hinge Movement Summary:
Start Position:
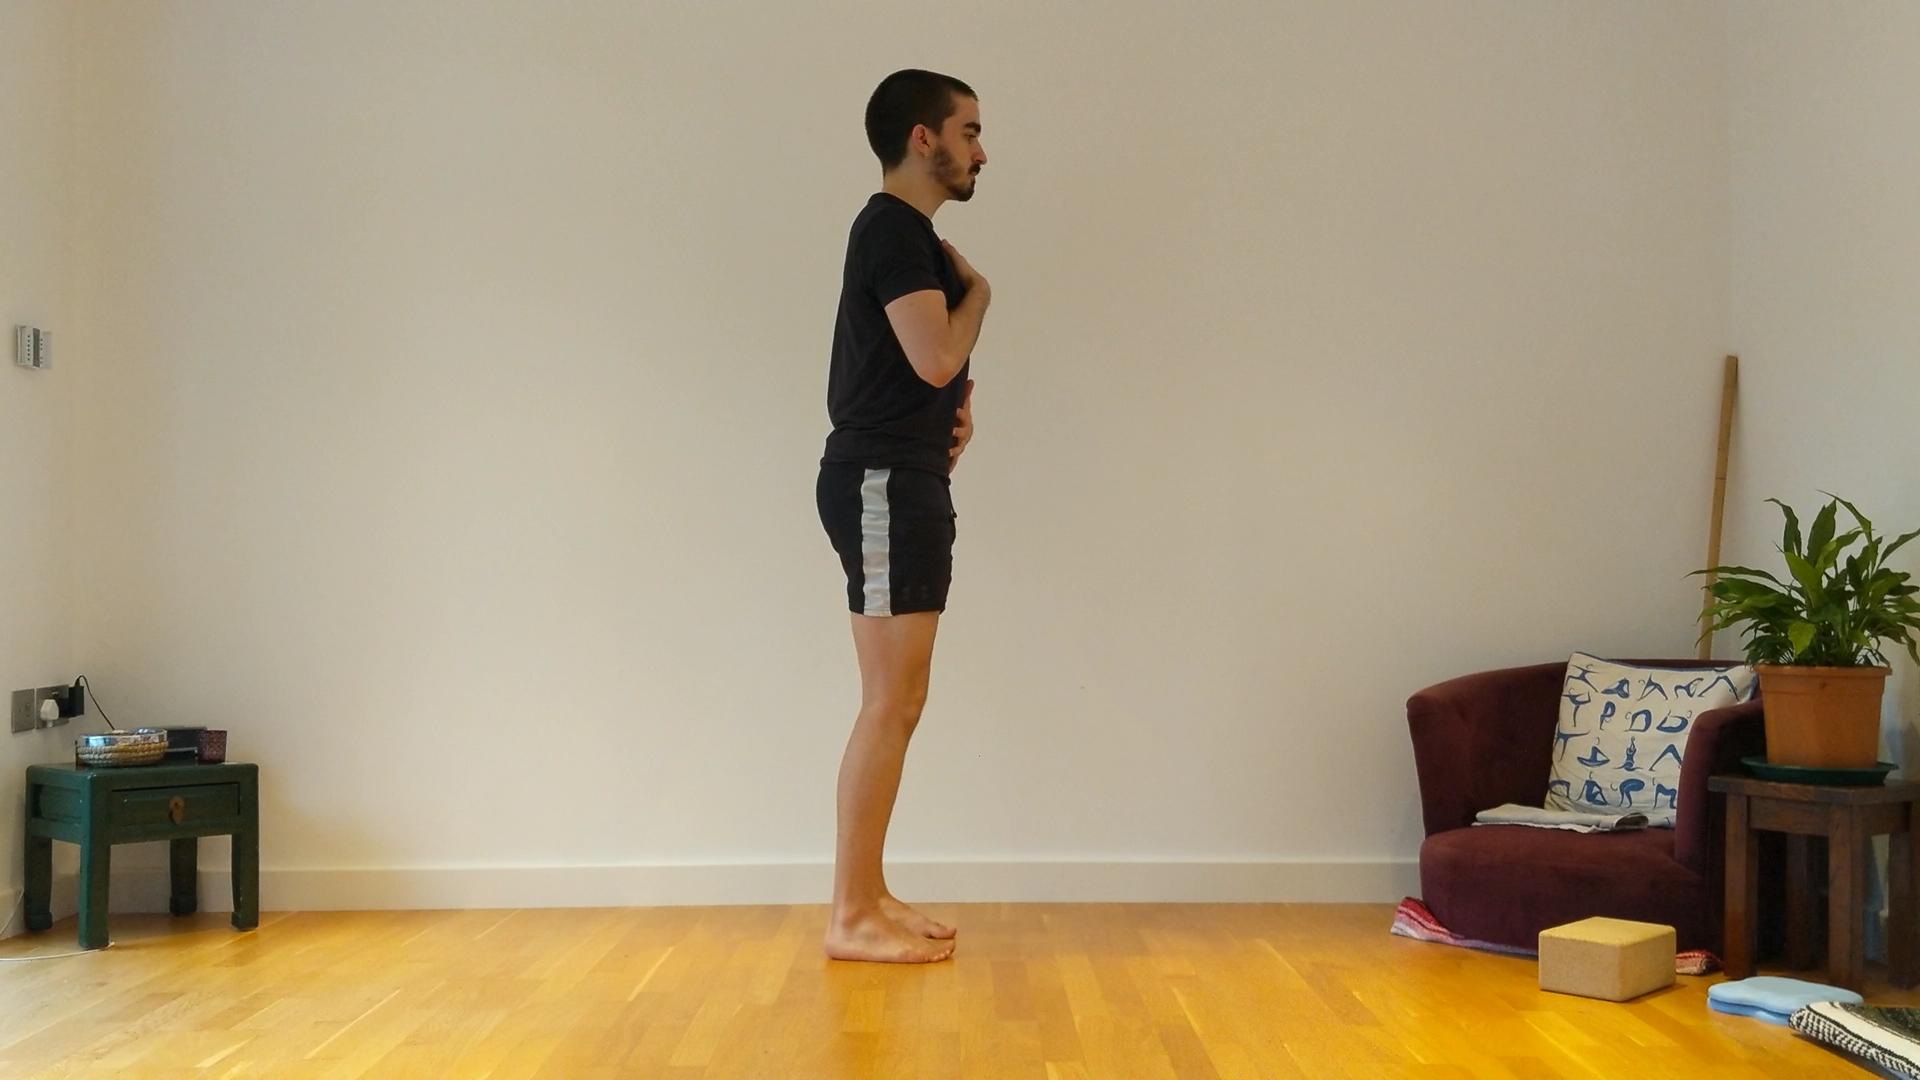
The start position for the unloaded hinge is a standing position.
- Feet are approximately shoulder width apart, toes pointing forward. Feet twisting into the ground opposite directions to each other, to drive the knees out
- Glutes squeezed like you are trying to hold a pencil between your butt cheeks, tucking your pelvis.
- A light ’empty brace’ (For detail of how to do this, check out my Dead Bug tutorial)
- Collarbones pointing up without allowing your ribs to flare out (Alternatively ‘stand up straight’ and push your sternum forward)
- Shoulders down away from your ears and pinched back slightly (your shoulders should feel broad)
- Head and neck nice and “tall”. Imagine a string is pulling the crown of your head up. Not so tucked that you’re making a double chin, but not sticking out like a chicken either.
- OPTIONAL: Hands resting on your Chest and Abdomen (As shown, if you don’t know what to do with your hands and don’t want to have to focus on them)
Movement:
- Keep soft knees. This means they will be allowed to bend, BUT not allowed to travel forwards. The shins should stay put, or even move slightly back as you descend.
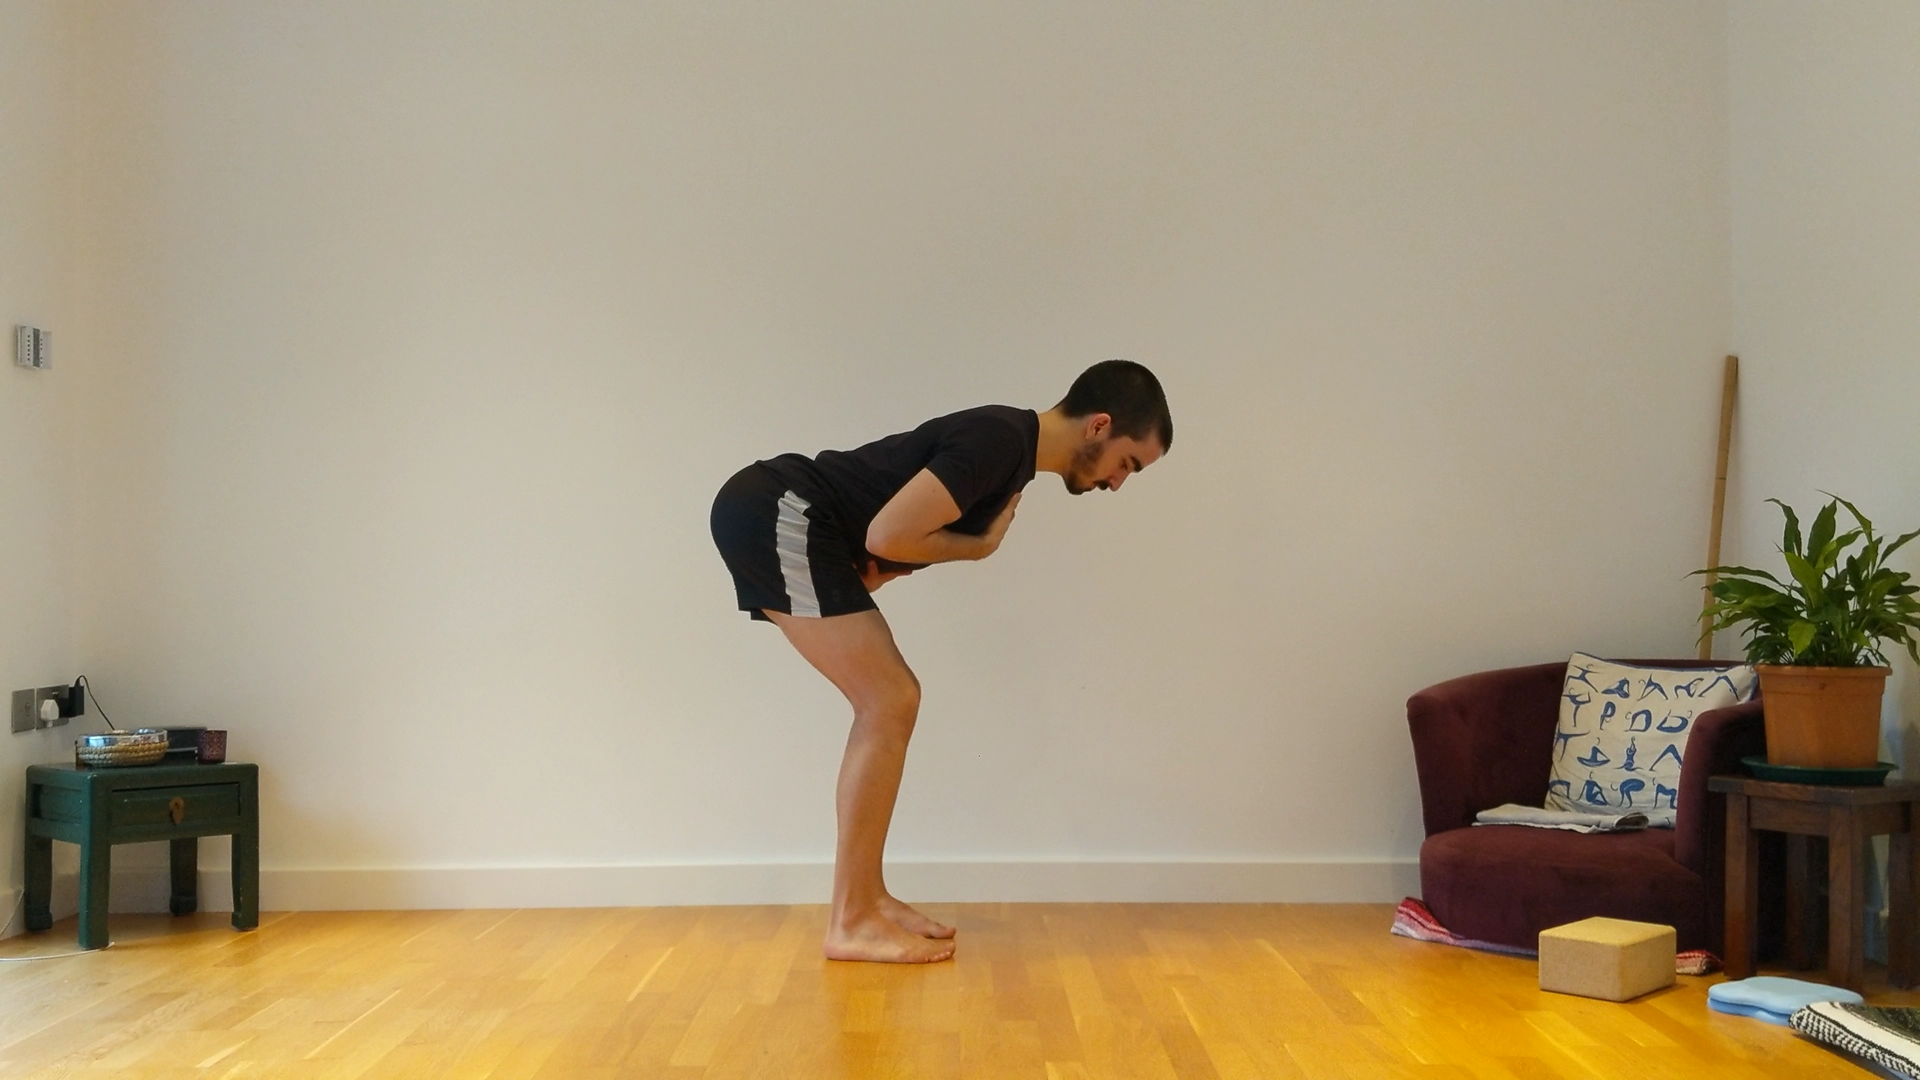
- Keeping the chest over the toes, and maintaining the positions created in the start position, send the hips back as though you were trying to touch a button far behind you with your butt
End Position:
- Straight line between your hips and the top of your head, with no excessive arching or rounding your lower back
- Glutes engaged to support you in the position (if you relaxed your glutes you’d fall backwards)
- Shins should be vertical or slightly back.
Common Compensations:
Lower Back Rounding:
Incorrect:
Correct:
This is a clear example of movement ‘with your back’ vs ‘with your hips’. Notice on the left, my hips barely travel back, and the distance between my belly and my thighs barely changes (implying very little flexion at the hip). Conversely, on the right side, my back stays straight, my hips move way back, and my bellybutton reaches right between my thighs (implying a lot of hip flexion).
What causes this:
- (If only at the end of the movement) Going too deep for your hamstring flexibility
- (If from the beginning) ‘Bending over’ rather than sending the hips back.
How to fix it:
- Limit your depth according to your hamstring flexibility
- Reach back with the hips, don’t “bend over”
Excessive Knee Bend:
Incorrect:
Correct:
For context. This is not flat out “Bad Form” if you are simply existing within the world, bending over to pick things up as we discussed in the introduction to this guide. But if you are performing a hip hinge (an exercise intended to isolate the movement of the hips), then forward knee travel is undesirable for that purpose. If you were to do an RDL (a hinge while holding a barbell), having forward knee travel would take the load off of your hip muscles (glutes and hamstrings) and onto your thighs (quadriceps).
What causes this:
- Bad habit/poor form/ignorance
How to fix it:
- Use the following drills with a bench, in order, moving on to the second once the first feels easy:
Bench In Front Hinge:
To do this drill, set up with your knees against a bench (or other object like a chair), with your feet as far under the bench as you can get them with straight legs. From here, hinge. the object in front will prevent any forward knee travel, encouraging you to assume the proper position. Once you feel like you can do this movement without exerting much (if any) pressure on the bench in front of you, move on to the drill below.
Bench-behind:
Now that you’ve learned to not push your knees forward, this drill is a further reinforcement of actually trying to get the shins to travel slightly backwards. Turn around and face away from the bench, and stand an inch or two away from the point that your legs would touch the bench (I’m actually almost standing too far away in the video, but wanted to demonstrate the effect clearly). From here, hinge, and try to reach your calves back to touch the bench at the bottom of the movement.
Applications of the Hinge in Training:
Once you make sense of the hinge, it can be applied to weight training, to learn the Romanian Deadlift (RDL), and eventually the full Deadlift.
Here is a little sequence of me hinging with a stick (RDL) for a few reps, and then turning it into more of a deadlift pattern, to simulate the movement with a loaded barbell.
Guides on the RDL and Deadlift are coming soon!
Progressions:
In an ideal world, if you had access to weights of some form, you would then transfer your hinge technique into working on the Romanian Deadlift, and then the full Deadlift, and begin to progressively overload that with more weight over time to increase your strength.
However, if you do not have access to weights, you will quickly find that the only thing that is really difficult about the bodyweight hinge is the technique/coordination. Muscularly, its about as hard as… bending over and standing back up. Not what you’d traditionally consider ‘strength training’. This means we are going to need to get creative with our progressions to be able to actually challenge the body. All of the following progressions can also be used if you only have access to minimal weight but want to make the most of it.
Kickstand Hinge:
In a world where you don’t have access to weight, but want to continue to challenge your hinge, you can start to progress towards a single leg hinge. The first step to this is a kickstand hinge. Stand with your knees together, bend one leg up, point your toe, and lower your leg back to the floor. You should now be in a position where your knees are both under you as if you were standing, but one leg is gently propped up on the big toe behind you with barely any weight on it. From here, hinge back while keeping 95-100% of your weight on the front leg. The back leg’s big toe is only there for gentle balance assist. You should not rock your weight back onto it.
Incorrect:
Correct:
Kickstand-lifted Hinge:
Next, we remove the slight balance assist afforded by the back foot, but keep the knees in the same position. Knee can be pinned together, or if that messes with your balance and makes you feel like you’re tilting, you can also just hold it a few inches apart.
“Warrior” Hinge:
Finally, we extend the non standing leg behind us, raise our arms overhead, and attempt to get our torsos as close to parallel to the floor as we can. This will necessarily involve slightly more knee bend than a normal hinge.
The major key form cue with this is to make sure the pelvis is level. If you are tilting off to the side of the standing leg your glute med is slacking off and won’t be working properly.
Support the Creator!
I make all this content for free because I want to help people as much as I can, and want to make fitness as accessible and easy to understand as possible, I wouldn’t think of charging for any of what you see here, but running this site (and being alive!) has some costs associated with it! I’ve never liked the idea of littering my website with ads, so I have been keeping the site ad free for as long as I’ve been running it. However, that means that even though the website gets fairly high traffic, it doesn’t make any money on its own!
While I dont have a patreon or other methods of flat out donation, if you like this content a lot, want to keep the site ad-free, and want to say thanks to the person that made it (me!), I do have a premium exercise library hosted on this site that you can subscribe to for only £5 per month. If you do decide to sign up, it’d be even better for you than donating anyway, because you get some nice premium content as well!


Follow me on Social Media!